Sony a6700 Underwater Settings
Posted by Nirupam Nigam on December 7th, 2023

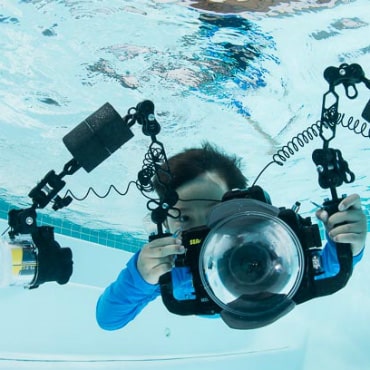
The Sony A6700 is the latest upgrade to the Sony a6000 aps-c series of cameras. Equipped with Sony's latest advancements in AI autofocus and video features, the A6700 also features Sony's newer style of menu. The camera is absolutely packed with new settings and it is very easy to customize to fit your underwater workflow. That's why we put together this guide to the best underwater settings for the Sony a6700. Make sure you check out our guide to the best underwater housings for the a6700 as well!
Top Tip for Underwater Photographers: If your screen is black when you are shooting with strobes, check your live view display settings. Menu -> Shooting Menu - > 9 "Shooting Display" -> Live View Display Set. Turn this setting off for photos with strobes and on for photos without strobes or topside shooting.
Getting to Know Your A6700 - Buttons and Dials
Using Your Dials to Control the Triangle of Exposure
If you're a Sony shooter, you'll be very familiar with the layout of the Sony A6700. The camera has three dials for you to control your triangle of exposure - ISO, shutter speed, and aperture. The front and back dials are assigned with shutter speed and ISO out of the factory so I custom set the rear d-pad dial. This can be done by hitting menu -> scrolling to the yellow set up menu -> panel 3 (operation customization) -> Custom key/dial setting (photo or video). Finally I scroll down to dial/wheel and select the third dial to change it to ISO. If you have an Ikelite housing you may need to set your third dial to aperture for photo and ISO for video as there is no control knob for the front dial.

Mode Dials and Video to Photo Switch
The mode dial has been redesigned on the Sony A6700 and we love it! The top section of the dial allows you to switch between manual mode, shutter priority, aperture priority, automatic, and your memory recall 1-3 presets. The switch below the mode dial allows you to quickly switch between video and photo mode. The mode dial and video to photo switch settings are combined - so if you're in manual mode on the mode dial and switch to video, you'll be capturing video in manual mode.
Customizing Your Buttons
The Sony a6700 has a lot of options for customization - including C1 through C3 custom buttons. These can be assigned by hitting menu -> scrolling to the yellow set up menu -> panel 3 (operation customization) -> Custom key/dial setting (photo or video). The custom key/dial menu will highlight the button that can be changed. After clicking "ok" you can select your desired setting from a menu. Here are a few settings that could be worth assigning to C2 and C1:
- White Balance (quick access for video shooters)
- AF/MF selector toggle (useful for video shooters who need to lock a subject)
- Focus area
- Tracking on
- Subject recognition part select (this allows you to select what part of the animal the camera will look for)
- Finder/monitor select (switch between viewfinder and LCD)
- Steady shot select (select your stabilization mode for video shooters)

The Fn Menu
The Fn Menu for Photo Mode
The Fn menu is a quick access menu that allows you to select all of your important settings with the single press of a button. We make sure to assign anything we might need to change quickly underwater in the Fn menu. You can customize your Fn menu by going to the main men -> scroll to the yellow set up menu -> 3. Operation customizations -> Fn menu settings. These are the following Fn menu settings we select for our photography Fn menu:
- Recognition part - allows you to select the part of the animal you want the camera to track
- Focus Mode - switch between automatic and manual focus modes
- Focus area - select the area you would like the camera to target for focusing. You can set autofocus tracking here
- Recognition target - switch between focusing on people and animals
- Steadyshot - control your stabilization
- Silent mode - switch to silent photography (topside setting)
- Live view display - turn this off when using strobes
- Metering mode - spot metering for TTL
- ISO
- White Balance

The Fn Menu for Video Mode
The Fn menu is also quite useful for video shooters so that they can switch between settings quickly. The customization process is the same as we listed above. Here are some Fn menu settings that we chose for underwater video:
- Picture Profile - allows you to select your picture profiles like HLG and S-Cinetone
- White balance - you can set custom white balance and auto white balance here
- Recognition target - switch between focusing on people and animals
- Audio Recording Level - adjust your mic levels
- Steadyshot - select your stabilization mode. We recommend active steadyshot stabilization - it's very good but has a slight crop
- Focus mode - switch between autofocus continuous mode, manual focus, and single autofocus
- Focus area - select the area you would like the camera to target for focusing. You can set autofocus tracking here
- Display LUT - you can turn your LUT on or off when filming in LOG. A LUT will help you visualize your footage so it looks as it would after color grading
- Peaking Display - this will show you what part of your video is in focus when you are in manual focus
- Breathing Comp - this will allow you camera to compensate for focus breathing
- Zebra Display - you can turn on zebra stripes to make sure you are not blowing out your highlights when filming
- File Format - switch between 4K and HD file formats
- Rec frame rate - Select your frame rate for filming (e.g., 60p, 30p, 24p)

Important Menu Settings
The Sony A6700's main menu is very extensive. It can be a bit daunting looking at it and wondering which settings to pick. This isn't a camera manual so we won't be going over each setting, but we are selecting the most important settings to know when setting up your camera for both underwater photography and video. We've indicated settings that are specific to video with the symbol "(Video)". To access these settings, make sure you are in video mode before you press the menu button.
The Red Shooting Menu
Panel 1 - Image quality
File Format - You can choose to shoot JPEG, RAW, or both. We choose RAW for editing.
(Video) File Format - We recommend XAVC S 4k
(Video) Movie settings - we recommend 60p and 200M 4:2:2 10-bit if filming in LOG (4:2:0 for the standard picture profile)
(Video) S&Q settings - you can select your bit rate and frame rate for s&q shooting which allows you to film in 4K/120p
(Video) Log shooting settings - turn this on if you want to shooting S-Log 3 which will give you a flat profile with a lot of detail that needs to color graded in post production
RAW File Type - Lossless compression gives you the best image quality

Panel 2 - Media
Format - clears your images from your SD card
Panel 4 - Shooting Mode
Mr Camera Set. Memory - you can select this so your camera remembers your current settings when you are in "1" "2" or "3" in the mode dial
Panel 5 - Drive Mode
Drive Mode - set your continuous shooting settings. We like to be in continuous low with strobes
Panel 7 - Image Stabilization
Steadyshot - keep this on unless you are doing a long exposure. For video "active steady shot" stabilization will crop the footage but keep it very stable. We enjoyed using this mode quite a bit.
Panel 9 - Shooting Display
Live View Display Set - turn this off when shooting with strobes and on when shooting without strobes

The Pink Exposure/Color Menu
Panel 4 - Flash Mode
Flash mode - make sure this is on fill in flash with strobes
Panel 5 - White Balance
Make sure your white balance is set to auto with strobes
Panel 6 - Zebra Display
Turning zebra displays on gives you a visualization tool to make sure you are not blowing out your highlights.

The Purple Focus Menu
Panel 1 - AF/MF
Focus mode - Choose between single or continuous AF. We prefer continuous as the autofocus system is incredible
Panel 2 - Focus Area
Focus area - choose your autofocus point size and area. We like using the tracking mode with autofocus continuous
Panel 3 - Subject Recognition
Subject Recog in AF - we turn this on
Recognition Target - select animal
Panel 5 - Peaking Display
Peaking Display - turn this on if you want to use manual focus
The Yellow Setup Menu
Panel 3 - Operation Customization
You can customize your buttons, dials, and Fn menu in this panel. Different set for still/mv allows you to disassociate your settings in video and photo mode so that your camera remembers two different sets of settings when switching between the modes.
Panel 7 - Finder/Monitor
Select finder/monitor - this allows you to select between your LCD and viewfinder. Most of the time we recommend leaving this on monitor for underwater photography since the viewfinder is quite small
Panel 8 - Display Option
(Video) Display LUT - this allows you to visualize LOG footage as if it was colorgraded while filming
Auto Review - this allows you to review your images after taking photos. We set it to two seconds.
Panel 12 - External Output
This panel allows you to select the output resolution to an HDMI monitor or recorder

Conclusions
The A6700 is a pro-level APS-C camera with extensive menu options and customizability. While this makes it a daunting camera to operate it has a quick learning curve which is worth the time spent learning your camera functions. If you have any questions about the A6700 or need help getting set up with an underwater housing, make sure you reach out to sales@bluewaterphotostore.com and we are happy to help!