SeaLife Micro 3.0 Review
September 19th, 2022
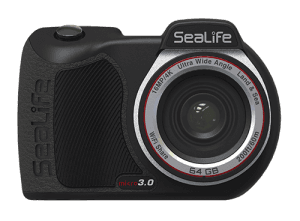
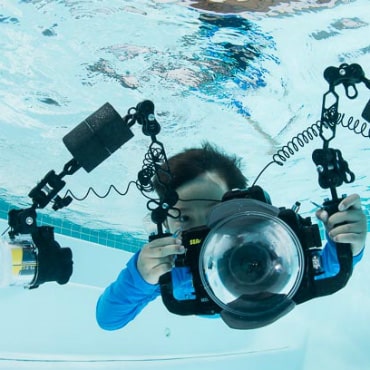
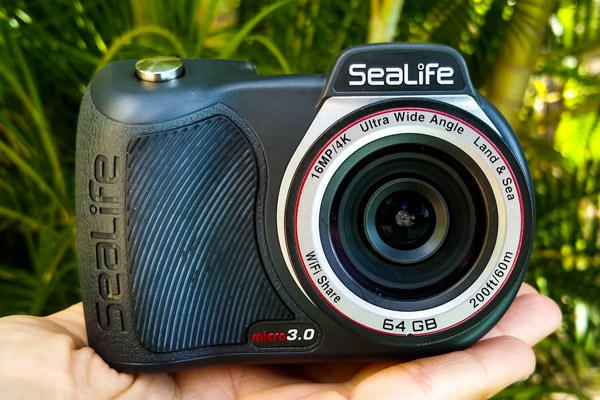
If you're looking for an easy, hassle-free way of taking underwater photos and videos, then the SeaLife Micro 3.0, Sealife's third-generation permanently-sealed camera, is an option you should definitely explore. The SeaLife Micro 3.0 doesn't require a housing and is ready to take diving straight out of the box. The 16-megapixel sensor can capture both JPEG and RAW images and shoots up to 4K 30fps videos. Combined with SeaLife's Sea Dragon series, lights is a very capable setup in a compact package.
Key Specs and Features
- 16-megapixel Sony CMOS sensor
- 4k 30 fps
- 100-degree fixed focus lens (130 degrees out of the water)
- Minimum focus distance: 15" to infinity
- Permanently sealed - no need for a housing
- Depth rated to 200ft (60m)
- Three piano-style keys for simple operation
- Easy setup mode
- Adjustable ISO settings - Auto, 100, 200, 400, 800, 1600, 3200
- Various capture modes: Single, Continuous, Time Lapse, Burst, Auto Exposure Bracketing
- White Balance: Auto, Shallow Underwater, Deep Underwater
- 64GB internal memory
- USB cable connection for transferring photos and charging
- Compatibility with SeaLife Sea Dragon lights and accessories
- Weight: 11.6 oz / 329g
- Size: 4.2" x 2.1" x 2.9" (10.7cm x 5.3cm x 7.4cm)
The Evolution of the SeaLife Micro
Back in 2014, SeaLife changed the underwater photography landscape when it launched the Micro HD, the world's first permanently sealed, waterproof camera. The SeaLife Micro HD didn't need a housing and could be taken underwater straight out of the box. It was a revolutionary design that was shortly followed by the Micro 2.0 in 2015. Fast forward to 2020, and SeaLife released the Micro 3.0, a significant upgrade on the older Micro 2.0.
This latest version came with a set of major upgrades over its predecessor. It's now able to shoot 4K videos (up to 30 fps), capture RAW as well as JPEG images up to ten frames-per-second in burst mode, and has built-in video stabilization.
Other notable updates include:
- Manual white balance and four underwater auto modes
- Max 3200 ISO
- 100-degree field of view
- High-resolution LCD screen
- 64 GB of internal storage as standard
Ergonomics
The body of the SeaLife Micro 3.0 is made from tough, durable rubber, making it shockproof and easy to hold using the large grip on the right-hand side. It's known for being one of the easiest underwater cameras to use, and for good reason. It only has three large 'piano-style' keys on the back that control the entire menu system and one large shutter button on the top to capture images or record video. This simple layout using large, tactile buttons makes it easy to operate even wearing thick gloves.
A ¼-20 tripod mount on the bottom makes installing a tray for additional stability or as part of a lighting setup easy and hassle-free. Weighing only 11.6oz (329g), the SeaLife Micro 3.0 is a great dive buddy for anyone looking for a lightweight, compact and easy-to-use underwater camera.
Setup
Charging
As the SeaLife Micro 3.0 is permanently sealed, there's no way to remove the battery. This means you have to charge the camera via a USB cable. To access the charging port, you must first ensure the camera is 100% dry and remove the USB port's rubber cover. The connection requires a special adaptor that is provided with the camera. When the camera detects it's plugged in, the LCD screen will display several options, and you have to scroll down and select the "Charge" option. It takes a little more than three hours to charge the battery fully.
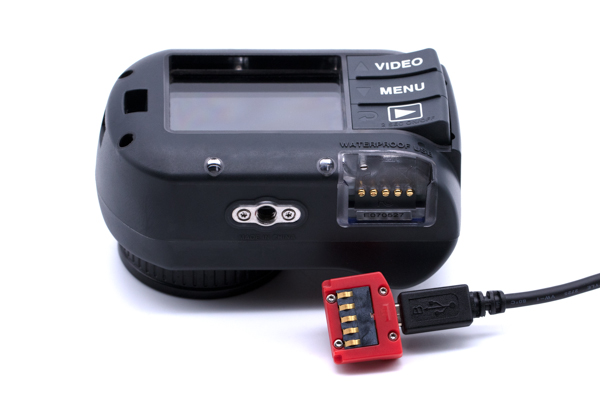
Downloading Images and Videos
You download pictures and videos using the same cable to charge the camera. The LCD screen will display several options when the USB cable is plugged in. All you have to do is select the option to transfer media to your computer.
Alternatively, you can transfer media via WiFi using the Micro 3+ app available through the Apple App Store or Google Play Store. This will download your selected media directly to your smartphone for fast editing and social media sharing on the go.

Settings
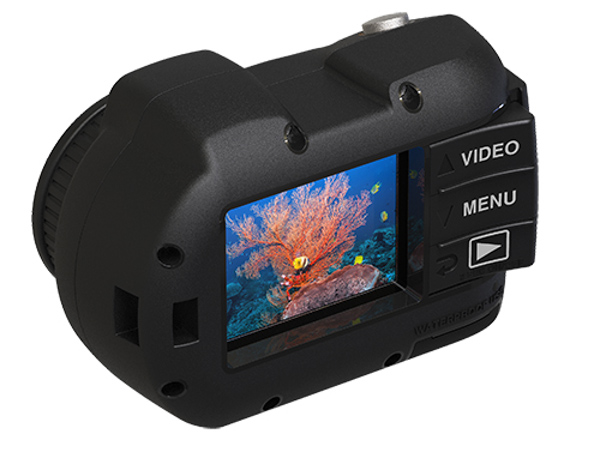
There are three large 'piano-style' keys stacked vertically along the right-hand side next to the LCD screen on the back of the camera. Starting at the top, you have "Video", then "Menu", and finally "Play".
The first thing you need to do is turn the camera on. To do this, simply hold down the play button for two seconds.
The "Menu" button opens up the main menu, where you can choose from Easy Setup, Image Settings and System Settings. Use the "Video" button to navigate up the menu and the "Play" button to navigate down. Use the shutter button to select a menu item. If you're using the camera without a light, choose Easy Setup > Underwater > Dive. If you're using the camera with one of the SeaLife Sea Dragon lights, choose Easy Setup > Underwater > Ext Light.
You can also manually adjust your white balance depending on the depth of your dive and the natural light conditions.
The Easy Setup mode allows you to get in the water and start taking pictures and capturing videos quickly without spending much time dialing in your settings. Choose from options including auto white balance, underwater shallow, or underwater deep.
Setting tips:
- WB: Auto
- EV: 0.0
- ISO (Picture): Auto
- RAW+JPG: ON
- Capture Md: Single
- Scene Md: Dive or External Light
- Quality: Super Fine
- Picture Res: 16MP(4:3)
- Video Res: 4k-30fps
- Metering: Average
- Sharpness: Standard
- Photo TimeLapse: 5sec
- Self-Timer: Off
- Color: Standard
- Video TimeLapse: Off
- Video Stabilization: On
SeaLife Micro 3.0 vs Olympus TG6
When it comes to permanently sealed underwater cameras, the obvious comparison to make is the SeaLife Micro 3.0 vs the Olympus TG6.
Right off the bat, one of the biggest differences between the Micro 3.0 and the TG6 is the ability to take macro shots. The TG6's fast f/2 lens has a minimum focus distance of just 0.4” (1cm) in dedicated super-macro mode. So the TG6 is probably going to appeal more to macro photographers.
However, the Micro 3.0 fights back with its depth rating of 200ft (60m), compared to the TG6's of only 50ft (15m), which is a shame for a permanently sealed waterproof camera. Most recreational divers who own an Olympus TG6 will have to purchase a separate housing which not only adds significant cost to their setup but also negates the size and weight saving of having a permanently sealed camera. Olympus claims the TG6 works down to 14 degrees Fahrenheit (-10 Celcius), which will be important for cold-water divers.
Both cameras can shoot 4K 30fps video, but the Micro 3.0 wins the resolution battle with its 16-megapixel sensor vs the TG6's 13-megapixel sensor.
Overall, deciding which camera is better depends on what you like to shoot. If you like to shoot macro photography, go for the Olympus TG6. But if you want a no-hassle camera ready to go out of the box down to recreational limits, then the Micro 3.0 is the camera for you.
Diving with the SeaLife Micro 3.0
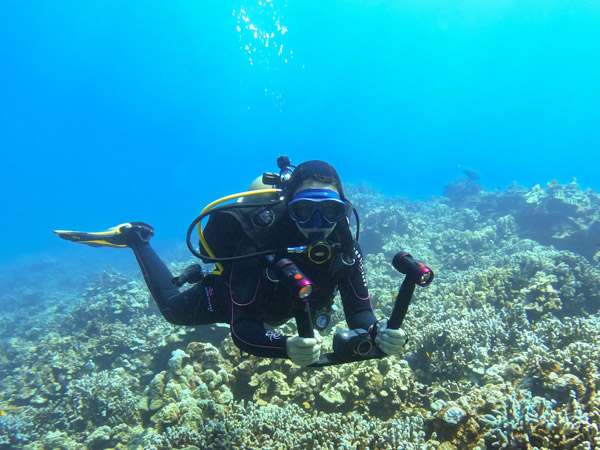
The first and most obvious thing you'll notice when diving with the SeaLife Micro 3.0 is its compact size and weight. Handling it underwater and clipping it to your BCD when you're not using it is easy and doesn't get in the way. Ergonomically, it gets even easier to use when you attach the Flex Connect Dual Tray Kit with two lights such as the SeaDragon 2500 lights. It increases the system's overall size, but it's still smaller than most and makes handling it even easier. In this case, the pros outweigh the cons.
The auto white balance and the easy setup modes do a pretty decent job at handling the camera's settings while you focus on composition. The super-fast shutter response of just 0.1 seconds means you'll have the best chance of capturing action in the moment.
Just remember that the minimum focusing distance is 15", so you can't get too close to your subjects. You'll need the SeaLife 10x Close Up Lens attachment if you want to shoot macro or get up close and personal with any of your subjects. The lens can be attached and removed from the camera while underwater so you can shoot different styles on the same dive.
The three-hour battery life means you can easily get a full day diving on a single charge without worrying, which is excellent considering you can't swap batteries on the Micro 3.0. You have to plug it in to charge it.
Wrapping up
If you want to keep things simple but still be able to take stunning pictures and videos, the SeaLife Micro 3.0 is the camera for you. Admittedly, it is limited with a fixed aperture of f/2.8 and a fixed focal length, so more serious enthusiasts and professionals probably wouldn't go down the Micro 3.0 route, but for casual underwater photographers, you can't go wrong with this camera.
It's an ideal travel camera or first camera for somebody looking to get into underwater photography. It's pretty capable, with a 16-megapixel resolution and the ability to shoot 4K 30fps video, but it simplifies the process and allows you to get in the water as fast as possible and start capturing the underwater world.
The SeaLife Micro 3.0 is available now from Bluewater Photo.