How to Edit 360 Underwater Video
Posted by Axel Busch & Andrew Simpson on February 1st, 2024
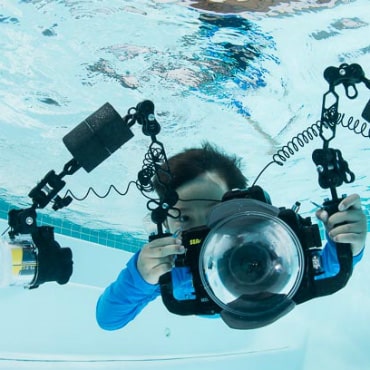
Editing 360 underwater footage can a daunting task for the unbaptized. But fear not! It's actually a lot easier than it may seem at first. In this video, Andrew Simpson from Mantis Sub joined us to explain his process for editing footage captured with the Mantis Sub RS 360 housing. This underwater housing for the Insta 360 One RS, is easy to use. All you have to do is place the camera in the housing, click the "on" button, and you're off to the races.
So read on to check out these additional tips for editing your footage:
1. Install the Insta360 Studio Application
In order to start editing, you need to download the Insta360 studio editing application. You will need to register your camera with the application before you can edit, so make sure you buy your Insta360 One RS from legitimate dealers like Bluewater Photo.
2. Import Your Footage
The first step to editing with the Insta360 studio editing software is to import your footage and view it. 360 videos are stored as LRV files. Importing files for editing can be done directly from your camera, its memory card, or your computer/USB drive. It's crucial to create a backup before editing or recording new videos. To edit directly from the camera, enable U-Disk mode, connecting it via USB-C cable. Alternatively, use a card reader or copy videos directly by enabling U-Disk mode in camera settings, connecting via USB-C, and importing files into Insta360 Studio. Choose from options like "Later," "Select Files," or "Import All," or manually import by clicking "Open Files" or dragging & dropping into the left panel.
3. Stabilize and Color Correct Your Footage
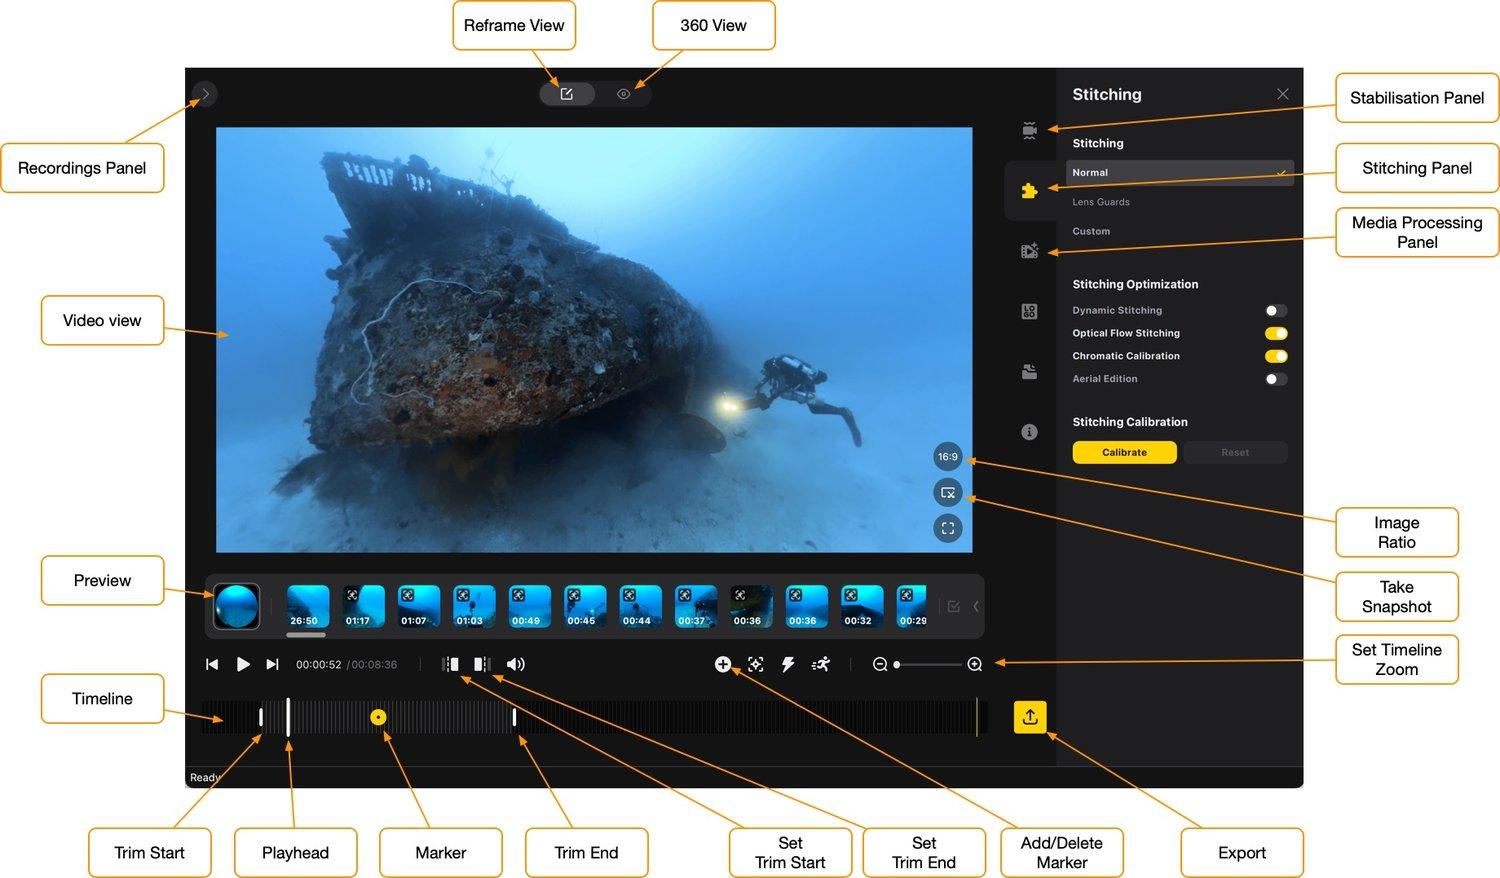
Adjusting Stabilization, Stitching, and Color in Insta360 Studio is done using the right-hand side panels. Start by selecting the appropriate settings for Stabilization, Stitching, and Media Processing after choosing your recording.
Navigate the timeline playhead to a frame suitable for color correction, preferably showing sand, faces, or the primary subject.
Configure the following settings using the right sidebar panels in Insta360 Studio:
Stabilization Panel:
- Enable "FlowState Stabilization"
- Enable "Direction Lock"
Stitching Panel:
- Enable "Optical Flow Stitching"
- Enable "Chromatic Calibration"
- Avoid clicking "Calibrate" as it's not optimized for the housing.
- Click "Reset" if enabled.
Media Processing Panel:
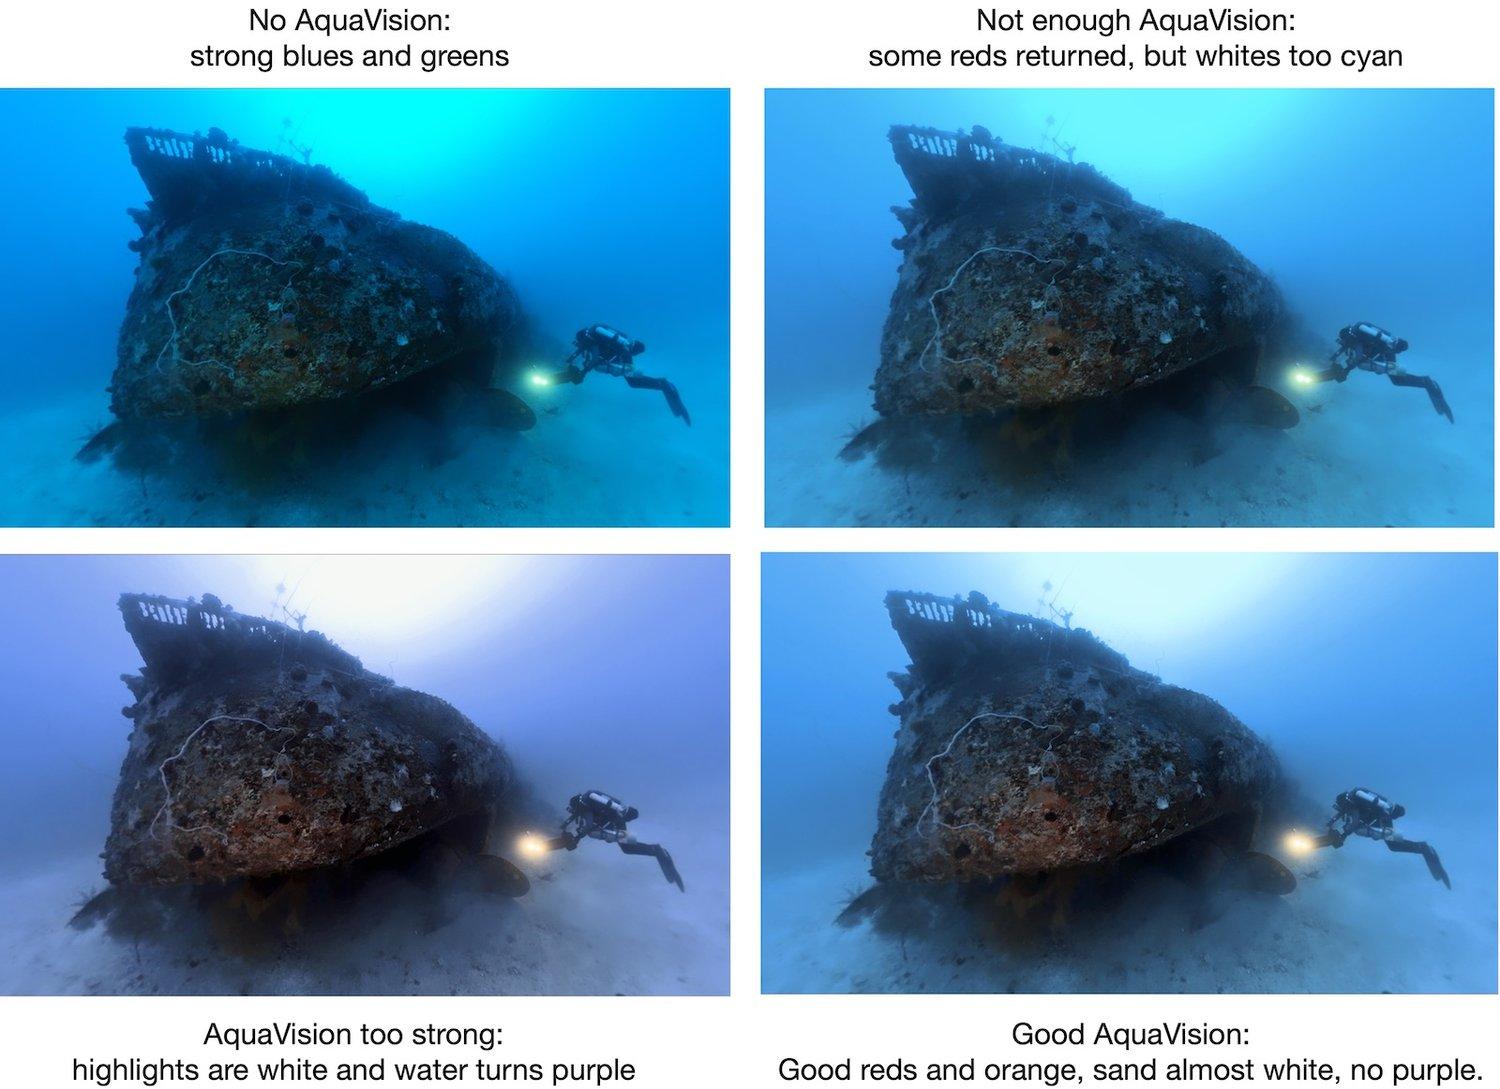
- Enable "AquaVision 2.0"
- Set "Hue" and "Strength" (typically between 30 and 70, avoiding strong cyan/purple water).
- Be cautious with excessive strength to prevent strong contrasts and blue banding.
3. Trim Your Clips
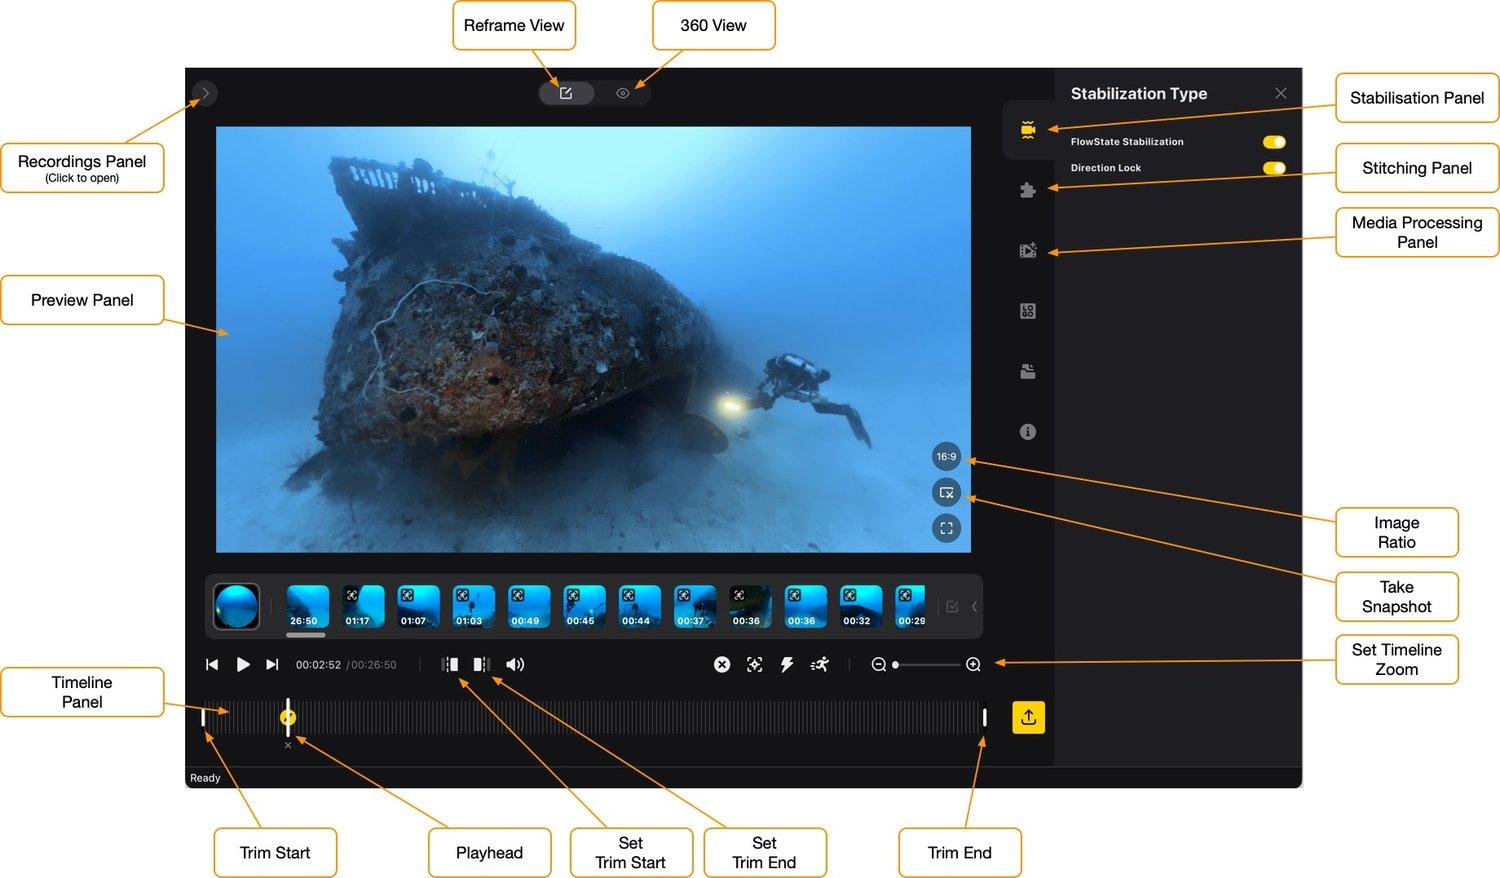
Customize your video by adjusting the start and end using trim markers. Easily remove unwanted seconds or export specific highlights with these steps:
- Click on the timeline to position the playhead where the clip should start.
- Press "Set Trim Start."
- Move the playhead to where the clip should end.
- Press "Set Trim End."
Export your video, including only the frames between the Trim Start and Trim End markers. Note: While the markers cannot be set outside the selected segment using buttons, you can click-hold and drag them along the timeline for segment adjustment.
4. Keyframes and Tracking
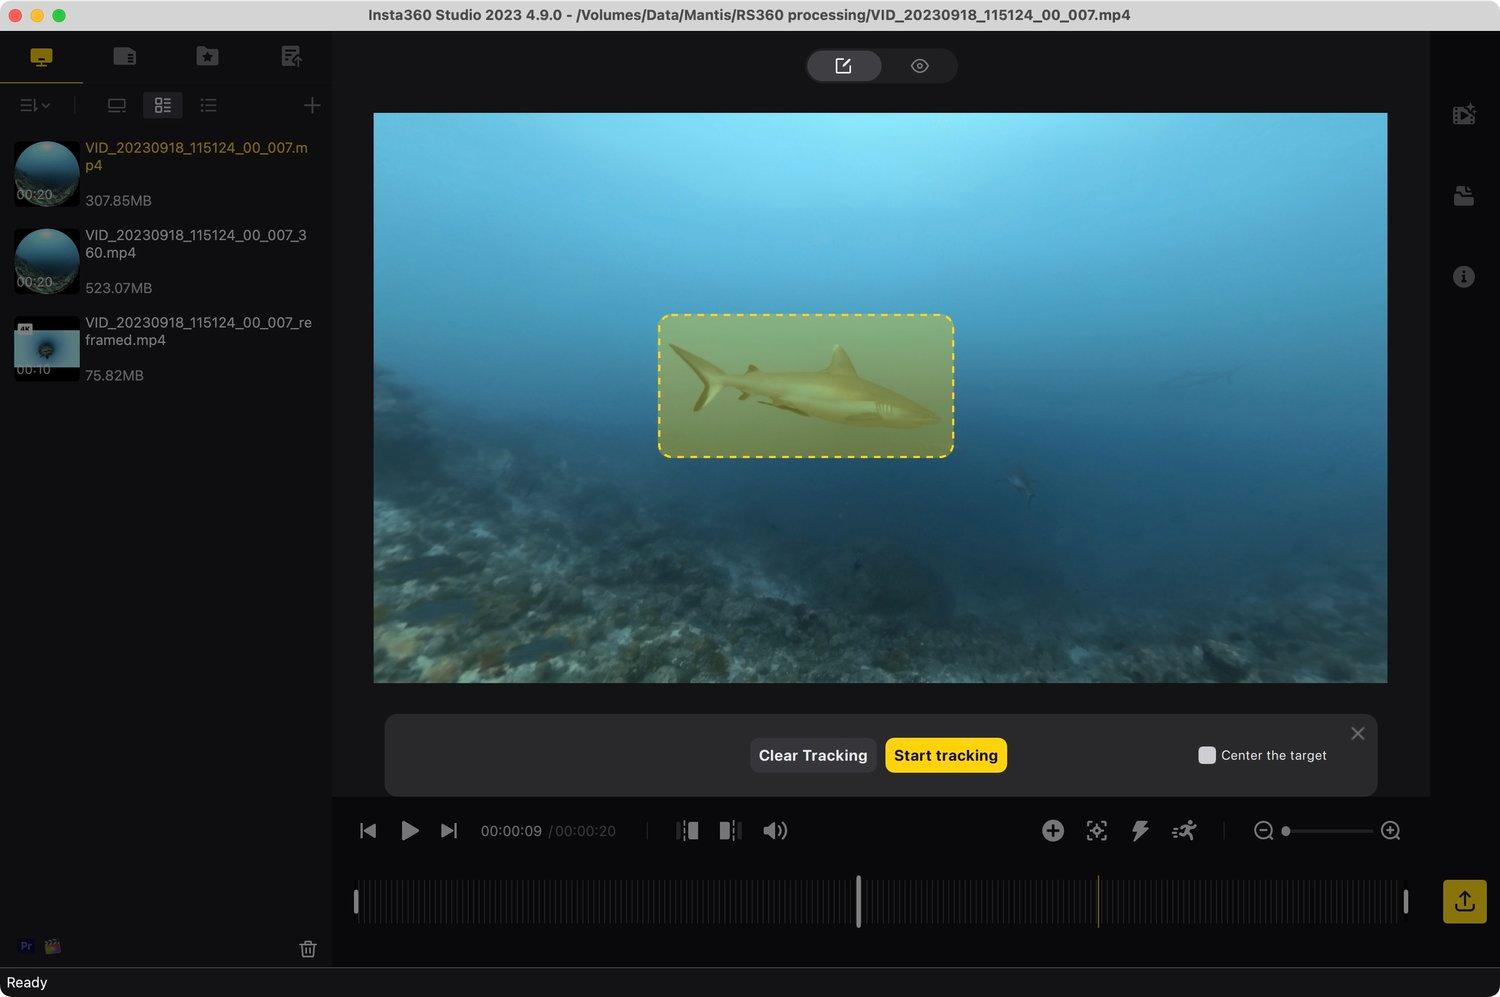
Create dynamic perspectives in your 360 videos by seamlessly transitioning between views using Keyframes. Unlike traditional recording, 360 cameras capture everything, allowing you to later choose what to showcase.
To switch between views and zoom levels:
- Activate Reframe view (the 'Edit' icon above the video).
- Place the playhead on the timeline where you want the change.
- Click "Set Keyframe" (+).
- In the Keyframe panel, adjust view, zoom, and orientation using sliders or presets (e.g., Tiny Planet or Crystal Ball).
- Insta360 Studio ensures smooth transitions between Keyframes.
For an automated subject-tracking feature, utilize Deep Track by clicking the [+] button and following instructions. Explore the versatility of your footage with these easy-to-use tools.
5. Export Your Footage
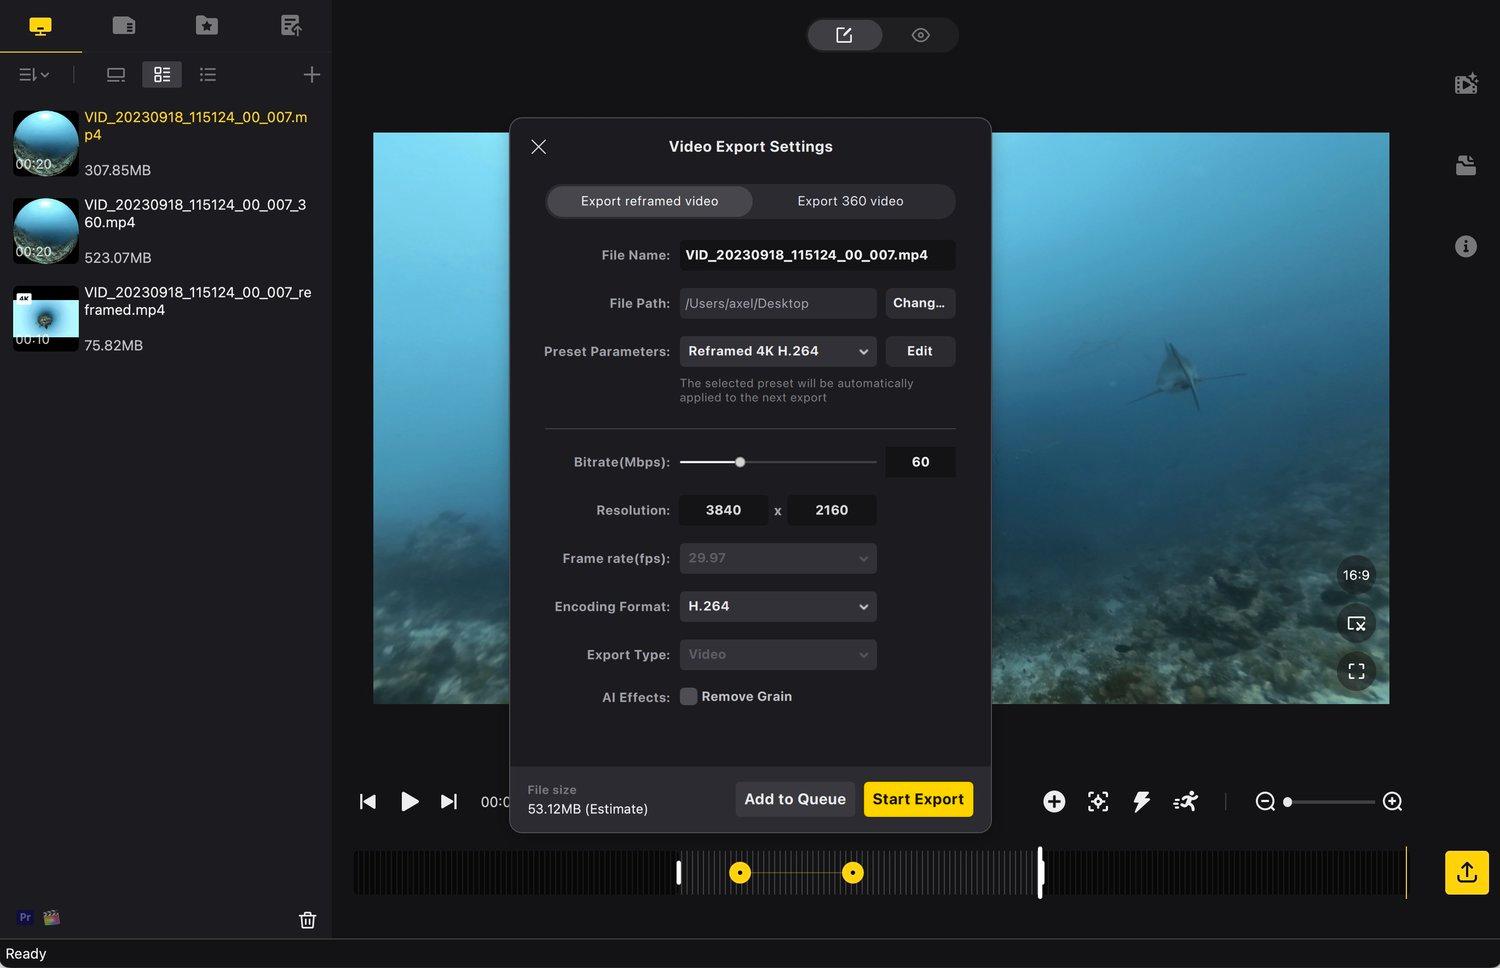
During the export process, Insta360 Studio applies your changes to each frame and renders a video file at the desired resolution. The default export settings are usually just fine, but they can be optimized for certain use cases (phone, upload, edit further).
Resolution: 1920x1080 is the default and matches approximately the resolution of the view of the 6K 360 video that is used for the “Default” settings. However, if you choose a wider field of view, you leave pixels unused. If you want to get the maximum quality it can be better to export in 3840x1920 instead, and apply some sharpening in the video editing software.
- Click “Start Export”
- Adjust export settings
- Standard HD:
- Bitrate: 25
- Resolution: 1920 x 1080
- Encoding: H.264 or H.265
- H.264 is better for further editing and streaming
- H.265 is a smaller file size
- Export Type: Video
- Up-scaled for further post production:
- Bitrate: 60
- Resolution: 3840 x 2160
- Encoding: H.264
- H.264 is better for further editing and streaming
- H.265 is a smaller file size
- Export Type: Video
- Optional: Save parameters as "Reframed 4K
- Standard HD: