Canon R6 Mark III Underwater Settings
Posted by Nirupam Nigam on July 2nd, 2026
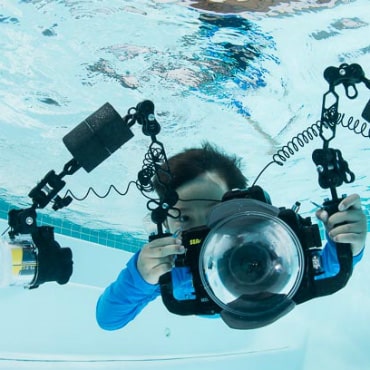
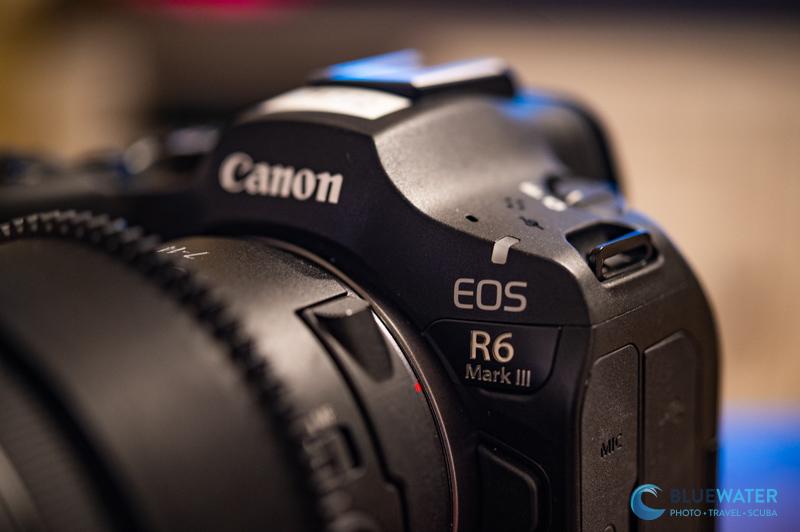
The Canon EOS R6 Mark III is Canon's newest hybrid camera for underwater shooters. It is packed with 32.5 megapixel still images, very good autofocus, quick burst speeds, 4K video up to 120p, and 7K video options for shooters need a higher resolution for cropping. As with any new camera, it can be a little daunting when you are first setting up the R6 III. Thankfully, if you are a Canon shooter, the R6 III should feel very familiar. If not, you're in good hands. After diving with the R6 III in the Galapagos, we've put together our favorite underwater settings for the R6 III so that you don't have to figure them out yourself.
Considerations Concerning the Canon EOS R6 Mark III's Dials and Joystick
The Canon EOS R6 Mark III has a very comfortable body and control layout. Like the R5 and R6, the camera is built around a joystick, rear dial, top dials, and a quick menu system that makes it fairly easy to change your exposure, autofocus, and white balance settings underwater. This is a great thing for topside shooters, but underwater it can make things a bit tricky depending on your housing. Some housings will give you full control of the joystick and some may require you to rely more on the dials.
So whats the solution? Controlling your settings with the dials! The R6 III has enough physical controls that you do not need to be touching the screen or diving too deep into the menu during a dive. It takes some getting used to, but after a few dives, scrolling through settings via the dials is actually quick and intuitive. Just be careful that you aren't accidentally changing your shutter speed, aperture, and ISO when you are scrolling through your menus.

Customizing Your Dials: Shutter Speed, Aperture, and ISO
The triangle of exposure - shutter speed, aperture, and ISO - are really easy to adjust on the Canon EOS R6 Mark III. The three main dials can be used to control each leg of the triangle. This is one of the most important customizations to make before taking the camera underwater because you will want your exposure controls to feel natural through a housing.
To customize your dials, click the "menu" button, scroll to the green customized controls menu, and select the dial/control customization settings. I like to keep shutter speed, aperture, and ISO on three separate controls so I do not have to think when the action is happening. This is especially important with wide angle, sharks, whales, sea lions, and any subject where you only get a few seconds to take the photo.

The Q Menu
The Q menu is the most important menu that an R6 Mark III user will scroll through during general use of the camera. Take a look at your Q menu and make sure to get very familiar with it - the Q menu includes settings that you are likely to switch often during a dive. These include autofocus point selection, autofocus modes, recording file type, drive modes, metering, white balance, and movie recording size.
Here are the main Q menu settings to consider for general underwater photography:

AF Area / AF Mode - The best AF setting will depend on what type of photos you are taking and your style of shooting. Subject tracking is very good on the R6 III and can be useful for fish, turtles, sharks, sea lions, and other quick subjects. For macro, 1-point AF or spot AF is still very useful because you often want to place the focus exactly on the eye or rhinophore. Expanded area AF is a good mode if you are shooting quick animals but don't want to rely completely on tracking.
AF Operation - AF operation lets you choose between continuous autofocus or single autofocus. Continuous autofocus, also called Servo AF, is where your camera will continue to adjust focus as your subject moves. Single autofocus, or One Shot AF, is where autofocus locks after you half press the shutter or press AF-ON. We recommend using Servo AF for quick subjects and One Shot AF for stationary subjects. For macro, I still like Servo AF when the subject is moving in surge, but One Shot AF can be better for very deliberate compositions.
Image Quality - Generally image quality should be set to RAW - especially if you intend to edit photos in Adobe Lightroom. You can also choose to shoot RAW + JPEG or just JPEG, but RAW gives you the most flexibility underwater.
Drive Mode - Drive mode will allow you to select how many photos your camera takes in a given period of time when you hit the shutter button. Most situations will call for single shooting. If you are working with quick subjects but you have strobes, then low speed continuous is usually better because your strobes will not recycle fast enough for extremely high frame rates. If you are shooting ambient light, pelagics, whales, dolphins, sea lions, or bait balls, then high speed continuous can be useful.
Metering Mode - If you are using strobes then select spot metering. If you are shooting ambient light then evaluative metering can be a good option depending on your style of shooting. Center weighted can be useful for backlit scenes or subjects in blue water.
Anti-flicker shoot - Off
White Balance - AWB for still photos if you are shooting RAW. For video, you will usually want to custom white balance unless you are using video lights.
Picture style - Standard for most still shooters. It will not affect your RAW files in Lightroom.
Auto Lighting Optimizer - Off
Cropping/Aspect Ratio - Full
Important Customizations
Selecting Your AF Point
The Canon EOS R6 Mark III has autofocus coverage across almost the full frame, which is great for underwater photography. However, taking advantage of that coverage underwater can be a little clumsy if your housing doesn't give you full joystick access. The easiest way to work around this is to make sure you can quickly reset your AF point to the center.
I recommend customizing one button so that it moves the AF point back to the center with one click. This is useful when you lose your AF point on the edge of the frame and suddenly a shark, turtle, or fish swims right in front of you. It is much faster to recenter the point than to hunt around the frame with a joystick while looking through a viewfinder.
For many shooters, the best underwater autofocus setup will be:
AF Area - 1-point AF or Flexible Zone AF for macro
AF Area - Subject Tracking. I like to use tht in conjunction with single point, but you can use a wide area for large animals or scenes.
Subject to detect - Animals
AF operation - Servo AF for moving subjects, One Shot AF for stationary subjects
Switching Between Your EVF and LCD
Most housings will block the automatic EVF to LCD sensor, so you will need to manually switch between the two. This was important on the R5 and R6 and it is still important on the R6 III. You can switch between the viewfinder and screen in the yellow set up menu under screen/viewfinder display. You can also customize a button to switch between the two when you press it. I highly recommend doing this.

Turn Off Display Simulation / Exposure Simulation
IT IS EXTREMELY IMPORTANT THAT YOU DO THIS WHEN SHOOTING UNDERWATER WITH STROBES. The Canon EOS R6 Mark III can apply your exposure settings (ISO, aperture, shutter speed) to the EVF and LCD preview. This is great for topside photography, but it can be frustrating underwater with strobes because your ambient exposure might be very dark before the strobes fire. If you are seeing a black screen when you are shooting underwater - this is what is happening.
To make sure you can see what you are shooting underwater, go to the red shooting menu and find display simulation. Disable exposure simulation when shooting with strobes. For ambient light stills or video, you can leave it enabled if you want the screen to reflect the actual exposure more accurately.

Tweaks to AF and Subject Detection Settings
Autofocus settings can be complicated and variable depending on your style of shooting. However, we do have some important recommendations for general underwater photography. The AF menu can be found by selecting the "menu" button and then selecting the magenta AF menu.
Subject Detection - Change your subject detection to animals. This is the best starting point for underwater photography. Fish eye detection is never going to be perfect because underwater subjects are often at weird angles, partially blocked by coral, facing the wrong direction, or moving through particles in the water. On top of that, fish faces are just weird. But when it works, it is excellent. Animal eye AF generally works better for macro and larger fish portraits than it does for tiny, camouflaged subjects.
AF Assist Beam - Turn this off. It's a waste of battery underwater and usually isn't doing what you think it is doing through a housing.
Initial Servo AF Point for AF Tracking - When you use autofocus tracking in Servo AF mode, it's important to be able to select where your AF point starts. I recommend having the point start as a single box in the middle. Therefor, you can place the box over your subject and then let the camera track from there. This is the quickest way to use AF tracking underwater.
Other Main Menu Changes
The main menu on the Canon EOS R6 Mark III is large and lengthy. It has every setting you could possibly want and can seem overwhelming at times. If you set up your Q menu, custom buttons, and C1-C3 modes correctly, you won't need to go into the main menu very frequently underwater. That being said, there are a few more things that are useful to know.
Some Things Are Better Left Off
Settings like auto lighting optimizer, high ISO speed NR, and long exp. noise reduction are better left off. It's best to do all your post processing in Lightroom - don't let your camera decide how to edit your data. This is especially true underwater where the camera does not know if your scene is blue because of water, white balance, depth, strobes, or creative intent.
External Speedlight Control
Chances are you'll be shooting the EOS R6 Mark III with strobes. If you are, you can select your flash settings in the red shooting menu under external Speedlite control. Please refer to your flash trigger manufacturer or TTL converter manufacturer settings in their respective manuals. This always takes priority over the settings below.
Flash firing - Enable
E-TTL balance - If you are using TTL use standard
E-TTL II meter - Evaluative
Continuous flash ctrl - E-TTL each shot
Slow synchro - 1/250
Your flash function settings and flash C.Fn settings will be determined by the manufacturer of your flash trigger or sync connection. Please refer to them for the correct settings. With underwater strobes, make sure you test your trigger and sync speed before travelling. Nothing is worse than getting on a liveaboard and realizing your trigger setting is wrong.
Formatting Your Card
To format your memory card, go to the yellow set up menu and select format card. This is especially important before video shooting because high bitrate video and slow cards do not mix well. I would format the card in camera before a big video dive rather than just deleting clips from the computer.

Custom Settings
As we mentioned before, you can customize your dials and buttons in the green customized controls menu. This is worth doing before your first trip with the camera. Do not wait until you are on the boat. That is how you end up annoying your dive buddy while everyone else is already geared up.
C1-C3 Custom Shooting Modes
The C1-C3 shooting modes are very useful on the Canon EOS R6 Mark III. In fact, they are more useful on the R6 III than they were on the original R6 because the camera has more video modes that underwater shooters might actually want to switch between.
A very practical setup would be:
C1 - Wide Angle Stills
C2 - Macro Stills
C3 - Underwater Video
For dedicated hybrid shooters, I would consider:
C1 - Photo Mode
C2 - 4K/60p Video
C3 - 4K/120p or 7K/60p Video
To save your settings to a C1-C3 mode, go to the yellow set up menu and select Custom shooting mode. Then select register settings and your preferred custom shooting mode to save the settings. Make sure you update the custom mode after you dial in your final underwater setup.

Considerations for Underwater Video
Although the Canon EOS R6 Mark III is a very strong stills camera, it is also a serious underwater video camera. The biggest practical question is not whether the camera can shoot high-end video - it can. The question is what mode you should actually use underwater.
For most underwater shooters, I would normally pick 4K/60p. It is the best balance of detail, slow motion, file size, heat, battery life, and workflow. You can slow the footage down in post processing for more stability, and the files are much easier to deal with than 7K RAW. This is the mode I would use for reefs, divers, general wide angle, reef sharks, turtles, and most travel video.
4K/120p is the mode I would use for quick pelagic action - sea lions, dolphins, sharks, bait balls, whales, mantas, and anything where motion is the whole point of the shot. It gives you more slow motion and lets you smooth out fast action. The downside is bigger files, more battery use, and less flexibility in low light.
7K/60p is a more specialized setting. Macro shooters could consider 7K/60p because the extra detail can be useful for cropping, stabilizing, and reframing tiny subjects in post. It can also make sense for controlled video projects where maximum detail matters more than convenience. But for general underwater video, 7K/60p is probably overkill. It will create larger files and a more annoying workflow.
The Setting We've All Been Waiting For: Setting Custom White Balance in the Q Menu
In previous EOS R models, setting a custom white balance was extremely annoying compared to Sony and Nikon cameras. A custom white balance is essential for video shooters who want accurate, natural colors at depth. But with the Canon EOS R6 Mark III, this is now very easy to do. Click your "Q" menu on the back of the camera. Then scroll to the white balance setting and scroll to "custom". Then hit the "delete" button and line up the box with a white slate or fin held at arms length underwater. Hit the shutter button and your custom white balance will be set. That's it!


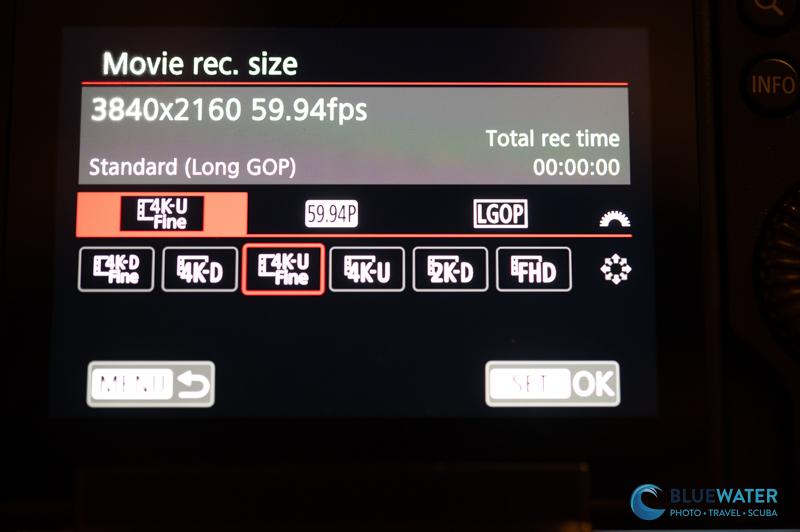
Setting Movie Recording Format on the Canon EOS R6 Mark III
The easiest way to set the movie recording format is in the Q menu. Select the "Q" button, select movie rec. size, then select your recording size, frame rate, and file type.
For most underwater shooters:
4K/60p - best all around underwater video setting
4K/120p - best for quick pelagic action and slow motion
7K/60p - best for specialty high-detail video, cropping, and macro projects
I know some people will immediately want to shoot everything in the largest resolution or highest frame rate, but that is not always the best underwater setting.
Full HD / 2K high frame rate - useful only if you need extreme slow motion and do not care as much about resolution
I would avoid making 7K your default unless you have a reason. Most divers are not going to want to deal with the storage, card requirements, and editing workflow for every dive. 4K/60p is the practical sweet spot. 7K is cool, but not everything in life needs to become a hard drive problem.
In your main "red" menu, you can turn on/off open gate which gives you additional height in your video and cropping capability for vertical video.
Under "movie rec. format" in the red menu when you are in video mode - choose 10-bit YCC422 if you want to shoot and edit LOG footage. 8-bit YCC420 is a good option if you wish to do minimal editing and not film in LOG.
Canon Log, Picture Profile, Custom White Balance, Zebra, and False Color
The video menu includes important features like Canon Log, picture profiles, custom white balance, zebra settings, and false color. These are some of the most important settings for underwater video.
Canon Log - Enable Canon Log if you want to color grade in post processing for more dynamic range. Disable it if you want easier files and faster editing. For most casual underwater shooters, Canon Log can be more trouble than it's worth unless they are already comfortable grading footage. If you want to get started color grading, download Canon's LUT as a good starting point that you can upload on top of your file in your editing software.
Picture Style / Custom Picture - If you are not shooting Log, use a neutral or standard picture style and keep the footage easy to edit. Do not overdo contrast or saturation in camera.
Custom White Balance - This is critical for ambient light underwater video. Set a custom white balance at depth using a white slate, sand, your fins, or another neutral target. If you are using video lights, match your white balance to the temperature of your lights. This can be done from the Q menu as we listed aboe.
Zebra Settings - Turn on zebras if you are shooting in high dynamic range scenes like sunballs, kelp forests, shallow reefs, or bright sand. A zebra level of about 95 +/- 5% is a good starting point. You do not want to blow highlights in the water column or on reflective fish.
False Color - False color is a very useful exposure tool for serious video shooters. It can be more intuitive than zebras once you get used to it. I would not make a beginner use it on their first dive, but it is worth learning if you shoot a lot of underwater video.
Digital IS - The R6 Mark III has good stabilization, but digital IS crops the image. I would leave digital IS off for wide angle unless you really need it. For macro video, it can be useful, but remember that any crop will change your framing.
Recommended Canon EOS R6 Mark III Manual Mode Starting Points
It's always great to start your dive with a good starting point. Here are some recommendations that we have for the Canon EOS R6 Mark III. They may not work in every situation, but they are a good place to start for general underwater photo and video.
Underwater Wide Angle Photos in Clear, Tropical Water
Shutter Speed - 1/160
Aperture - f/13
ISO - 200
Metering Mode (strobes) - spot
Metering Mode (no strobes) - evaluative (or center weighted with backlighting)
AF mode - Servo AF, animal subject detection, AF tracking
White Balance - auto
File Format - RAW
Underwater Wide Angle Photos in Dark, Cold Water
Shutter Speed - 1/60-1/160
Aperture - f/8-f/13 depending on available light
ISO - 400-1600
Metering Mode (strobes) - spot
Metering Mode (no strobes) - evaluative (or center weighted for backlighting)
AF mode - Servo AF, animal subject detection, AF tracking
White Balance - auto
File Format - RAW
Underwater Macro Photography
Shutter Speed - 1/160
Aperture - f/5.6 - 7.1 for bokeh, f/18-f/22 for detail
ISO - 100-200
Metering Mode (strobes) - spot
AF mode - Servo AF with tracking or One Shot AF with 1-point AF / spot AF
Subject Detection - Animals when it works, 1-point AF when it doesn't
White Balance - auto
File Format - RAW
Underwater Video - 4K/60p Recommended Default
Movie Rec Size - 4K @ 59.94p
Shutter Speed - 1/125
Aperture - f/8-f/13 for wide angle, f/5.6-f/10 for macro bokeh, f/18-f/22 for detailed macro
ISO - adjust to correct exposure; try to keep it as low as possible
Metering Mode (video light) - spot
Metering Mode (no video light) - evaluative or center weighted with backlighting
AF mode - Movie Servo AF for moving subjects, AF tracking
White Balance - custom white balance without strobes, or match the temperature of your video lights
Canon Log - enable if you want to color grade in post processing, disable if you want faster workflow
Zebra stripes - enable if you are shooting in an area with a lot of dynamic range
Underwater Video - 4K/120p for Pelagic Action
Movie Rec Size - 4K @ 119.9p
Shutter Speed - 1/250
Aperture - f/8-f/13
ISO - adjust to correct exposure; expect to raise ISO in darker water
Metering Mode - evaluative or center weighted
AF mode - Movie Servo AF, animal subject detection, AF tracking
White Balance - custom white balance or match video lights
Canon Log - enable if you are comfortable grading; otherwise keep it simple
Best Use - sea lions, dolphins, sharks, mantas, whales, bait balls, fast divers, and quick pelagic behavior
Underwater Video - 7K/60p for Detail or Macro Projects
Movie Rec Size - 7K @ 59.94p
Shutter Speed - 1/125
Aperture - f/5.6-f/10 for macro bokeh, f/18-f/22 for detailed macro
ISO - adjust to correct exposure; use lights when possible
Metering Mode (video light) - spot
AF mode - Movie Servo AF or manual focus for controlled macro shots
White Balance - match video lights or custom white balance
Canon Log - enable if you are grading and want more flexibility
Best Use - macro video, controlled shots, cropping/reframing in post, high detail scenes, and professional video projects
Conclusion
Fortunately for Canon EOS users, the R6 Mark III is one of the most ergonomic and intuitive full frame mirrorless cameras for underwater use. That's why the settings guide can stay fairly simple even though the camera is very capable. The easy dial controls, useful Q menu, excellent autofocus, and strong video options make for an excellent day to day underwater shooting experience.
For most divers, the important thing is not to use every feature. The important thing is to set the camera up so you are not fighting it underwater. I would keep still photos simple, shoot RAW, use Servo AF for moving subjects, turn off display simulation when using strobes, and set C1-C3 for the shooting styles you actually use. For video, 4K/60p should be the default, 4K/120p should be for fast action, and 7K/60p should be reserved for times when you really need the extra detail.
Nirupam Nigam
Nirupam Nigam, the President of Bluewater Photo & Scuba, is an accomplished underwater photographer and fisheries scientist with a deep-rooted passion for marine life. He began his journey in underwater photography at 15 and, by age 22, became the Editor-in-Chief of uwphotographyguide.com, the leading online resource for underwater photographers. As a North Pacific and West Coast Fisheries Observer, Nirupam spends months aboard fishing vessels in remote areas such as the Bering Sea and Gulf of Alaska, collecting critical fisheries data for the U.S. government. He hails from the West Coast, considering both Southern California and Western Washington home.